Ruby Gems
Ruby Gems
One of the major benefits of Rails is the large ecosystem that has developed around it, particularly the amount of open source code available for free. A huge amount of open-source Ruby projects are published on Github, where people can browse the source code, report issues, or contribute to the actual code.

When you find Ruby code that you want to use, you could theoretically download it and figure out how to include it in your project. However, no one likes manually installing, configuring and updating code or software, so Ruby developers instead distribute their code in easy-to-install packages called Gems. Gems are similar to browser extensions that are easily installed and updated.
Most Ruby Gems are published on RubyGems.org and downloaded from there. To browse gems by category and popularity, see ruby-toolbox.com. Once you've found the gem you want, it's time to add it to your application! In Rails, you specify what gems your application uses in the gemfile. This file is located in the root folder of your app, so go ahead and open it up. The gemfile primarily contains gems from the default Rails gemfile, along with a few additions for this tutorials.
Gemfile
source 'https://rubygems.org'  #source where gems are installed from

# Bundle edge Rails instead: gem 'rails', github: 'rails/rails'
gem 'rails', '~>  4.2.1'
# Use SCSS for stylesheets
gem 'sass-rails', '~> 5.0'

# ...
# (more general gems...)
# ...

# These gems are only for your development and test environments:
group :development, :test do
  # Use sqlite3 as the database for Active Record. Heroku does not allow this in production.
  gem 'sqlite3'

  # Call 'byebug' anywhere in the code to stop execution and get a debugger console
  gem 'byebug'

  # Access an IRB console on exception pages or by using <%= console %> in views
  gem 'web-console', '~> 2.0'

  # Spring speeds up development by keeping your application running in the background. Read more: https://github.com/rails/spring
  gem 'spring', '~> 1.3.6'

  # Stop tests at first failure
  gem 'minitest-fail-fast', '~> 0.0.1'

   # Adjusts test output
    gem 'learneroo-gem'
end

# These gems are only for your production environment
group :production do
  # These two gems are required for Heroku:
  gem 'pg'
  gem 'rails_12factor'
end
Your Rails app runs in different environments, i.e. development when your developing it and in production for the live site for actual visitors. Most gems are installed for all environments, but you can also specify that certain gems should only be installed for a specific environment. In the above gemfile, two gems are installed just for production, since they're required by Heroku.
Adding a Gem
When you're developing a site locally, you sometimes encounter errors that need fixing. But when an error happens on your production site, actual users can get affected without you knowing. To track error that happen on production sites, developers use an Exception Notifier service. This keeps track of the actual error information and can notify you when the error happens.
There are many good services available, but we're going to use Rollbar since it had a generous free tier.
To install Rollbar, add the following line to your gemfile, somewhere above the line group :development, :test:
gem 'rollbar', '~> 1.5.3'
(It's simpler to install Rollbar for all environments, even if it will primarily be used in production.)
After adding a gem to the gemfile, enter the following command in your terminal to install the new gem:
bundle install
This will install the new gem. To setup the configuration file, enter the following command:
bundle exec rails generate rollbar
This will create an initializer file to add Rollbar to your Rails environment.
Open up the file config/initializers/rollbar.rb:
require 'rollbar/rails'
Rollbar.configure do |config|
  # Without configuration, Rollbar is enabled in all environments.
  # To disable in specific environments, set config.enabled=false.

  config.access_token = ENV['ROLLBAR_ACCESS_TOKEN']   # 1

  # Here we'll disable in 'test':
  if Rails.env.test?                                  # 2
    config.enabled = false
  end
  #...
Looking at line #1, it seems we need to set some kind of access token. However, instead of doing that, we're going to disable Rollbar in development by changing line #2:
  if Rails.env.test? or Rails.env.development?
    config.enabled = false
  end
Heroku Addons
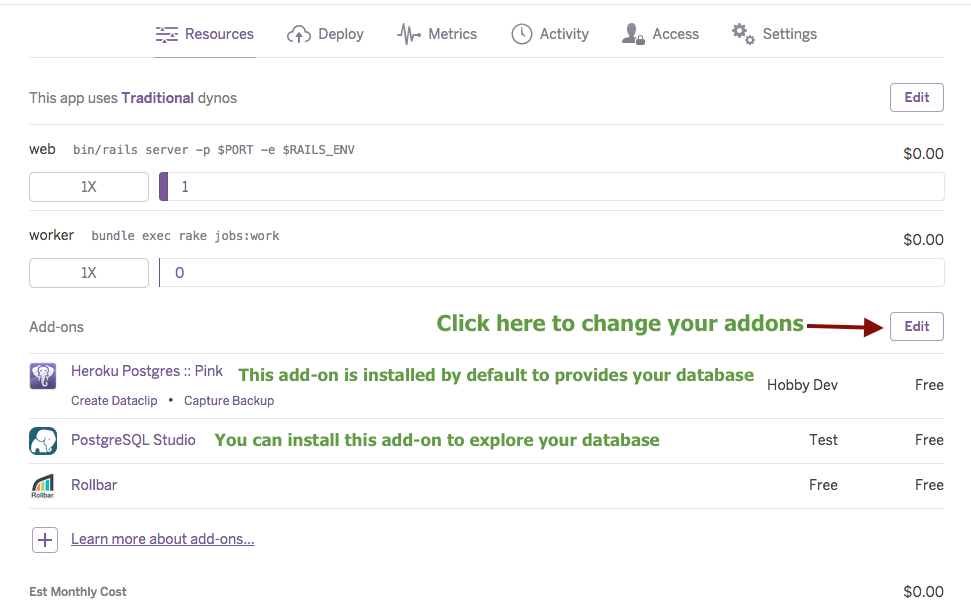
Now it's time to set up Rollbar on our production site. You could go ahead and sign up on Rollbar's website and get an access token, but there's an easier way. Heroku provides many services as addons that integrate right into your app. The only catch is that Heroku requires you provide your credit card information before adding addons, even free ones.
- Log into your Heroku dashboard and click on your store app.
- Click on "Edit" next to "Addons", start typing "Rollbar" and click on it.
- Click on "Save"
Commit your changes to git and push them to Heroku. You now have error tracking setup!
git add .
git commit -m "added rollbar"
git push heroku master
To view your errors, you can click on Rollbar from your Heroku app page. You can try it out by causing an error, such as going to a non-existent page:
http://yoursitename.herokuapp.com/thisCauseError
You will then be able to view the error in Rollbar along with associated information.