Your First Pages
The Models and Data Tutorial showed you how to create the back-end of a web application; this tutorial will show you how to create a full site. You'll learn to create simple web pages and then learn how to connect web pages with data from the back-end. You'll see how to build the application represented in the physical machine below. To get started, you first need to run your website on the rails server.
Rails Server
A web server is a system that delivers web pages to users who request them. A server can refer to physical computers or to the software that handles these requests. You're unlikely to ever need to deal with physical servers, but you do need to run server software to make your web application work on the internet. Even if you just want to try out your web application on your own, you'll need to set up a server on your computer for that purpose.
Fortunately, Rails comes with a simple built-in library for running a web server. Enter the following command into your console to start the rails web server:
rails server
On cloud9, you'll need to modify the command as follows:
rails server -b $IP -p $PORT
You should see the following output:
Hover below for more info
=> Booting WEBrick
=> Rails 4.2.0 application starting in development on  http://localhost:3000
=> Run 'rails server -h' for more startup options
=> Ctrl-C to shutdown server
[2015-04-14 16:10:10] INFO  WEBrick 1.3.1
[2015-04-14 16:10:10] INFO  ruby 2.0.0 (2014-02-24) [x86_64-darwin12.5.0]
[2015-04-14 16:10:10] INFO  WEBrick::HTTPServer#start: pid=18346 port=3000
Now that your server is running, navigate to your home page. On your computer, go to http://localhost:3000. On Cloud9, click on the link shown.

You should see the following page:

This is the default home page of a Rails application. Let's change that.
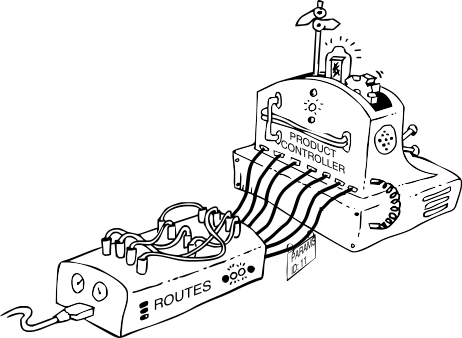
Routes Controllers Views
Once your server is running, you can rely on it to handle the low-level details of web requests. Your Rails application handles the higher-level tasks of what actions to take and what content to return for each request. When a visitor enters a URL, such as theautomatedstore.com/about, the server tells your application that someone would like to Get about from your site.
Your application now should do the following:
- route the request
aboutto code that will handle it - get the appropriate information to return the user (optional)
- return an actual HTML page to the visitor.
How is this done in Rails?
- A file called
routesis in charge of routing URLs to code in your application. It routes each legitimate URL to a controller action. - The Controller is the middleman in control of getting the relevant information for the visitor. In can set up variables that will be available to the view and often communicates with the model to get data (though we're not going to do that yet). Each action (or 'method') in the controller is in charge of returning a page to the visitor.
- The controller finished each action by returning a web page to the visitor. The web page is created by the View, which consists of templates that get filled in with data from the controller and returned as an HTML page.
Creating a Controller
The above description is complicated, but Rails makes it easy to create everything at once. Let's say we want to create 2 simple pages home and about for our website. Let's create a controller called Store for general Store informational pages. To create this controller for 2 simple pages, enter the following code in your console:
rails generate controller Store home about
This will output the following:
Hover over the lines at the top to find out more about what Rails just created
create  app/controllers/store_controller.rb
       route  get 'store/about'
       route  get 'store/home'
      invoke  erb
      create    app/views/store
      create    app/views/store/home.html.erb
      create    app/views/store/about.html.erb
      invoke  test_unit
      create    test/controllers/store_controller_test.rb
      invoke  helper
      create    app/helpers/store_helper.rb
      invoke    test_unit
      invoke  assets
      invoke    coffee
      create      app/assets/javascripts/store.coffee
      invoke    scss
      create      app/assets/stylesheets/store.scss
Rails just created a controller that will now work to show 2 web pages on your site. You can try it out by going to each of these pages:
/store/about
/store/home
You should see the following:

Note: In this tutorial, we usually show the relative links, without showing the full URL. For example, if you're site was http://localhost:3000, go to http://localhost:3000/store/about to see the about page. (If your site is located at http://sample-store-yourname.c9.io, you would go to http://sample-store-yourname.c9.io/store/about.)