- Objects
- Classes
- Inheritance
-
Programming in Java on Your Computer - Classes and Objects in BlueJ
- Trying out Code in BlueJ
- The Code for Creating and Using Objects
- Source Code and Methods
- Accessors and Mutators
- Constructor Code
- Scope
- Inheritance
-
BlueJ Review - Class Code
- Simple Debugging
- Interactive Picture
- Refactoring Code with Inheritance
BlueJ Review
In the next few nodes, we'll review using BlueJ and Object-Oriented programming (OOP), and we'll learn some new stuff too. To get started, open up another project: Shapes. It can be found in examples/shapes in the folder where BlueJ is installed or in the one you downloaded.
The Shapes Project will let you display graphics through its Canvas class. You don't need to know how Canvas works internally to be able to interact with it, which is one of the benefits of OOP.
BlueJ Interface
Before you get started, Click on View > Show Terminal so you can view the code for the actions you do in BlueJ. If the class rectangles have diagonal grey lines on them, click "Compile" to compile them. (You should have already clicked on Options > Record Method Calls.)
- Using the BlueJ interface, create a Circle instance
circle1. You can then inspect it to see the default values of its instance variables. - Invoke its makeVisible() method. This should cause a window to pop up with a circle in it.
- Invoke other methods on the circle, such as moveRight() and changeColor(). Notice what happens to the circle. You can now inspect the Circle again to see how its variables have changed.

Code Pad
- In the terminal, you should see the code for all of the actions that you just took. Select all of it and copy it.
- Click on the "Compile" button to re-compile the source code and erase everything from the Object bench. Now paste the code you copied into the Code Pad on the bottom right and press "enter".
The Code should cause the same visual results as before. Type circle1 in the Code Pad to get that Object returned. You can then double-click it to inspect its variables.
The Source Code
The BlueJ interface and Code Pad are good for trying things out, but to create an actual program you need to create a Class and edit its source file.
- Create a new Class in BlueJ named
Picture.- Click on "New Class" on the top left of BlueJ.
- Type in "Picture" in the dialog and click OK.
- Add the previous code to the constructor of the Picture Class.
- Double-click the Picture Class icon to open its source code.
- Remove the example code that BlueJ puts, but leave the Class and Constructor's headers and curly braces.
- Paste in the code (that you previously pasted in the Code Pad) into the Picture constructor.
- Run your code to view the pictures again.
- Compile your code. If there are any errors, make sure the curly-braces are all matched up.
- Create a new Picture Object in the BlueJ interface.
You should again get the same results as before.
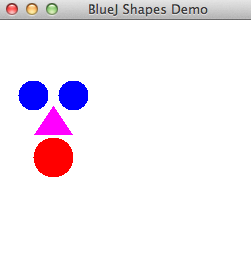
Task
Modify your Picture so it looks something like the one below. You can try out different methods using the BlueJ interface and then paste the code generated into the Picture class. Then, see if you can shorten the code to get rid of unnecessary steps. It's possible to create the smiley face below with 16 lines of code in the Picture constructor.
Challenge
What is the initial diameter of Circle?
Please sign in or sign up to submit answers.
Alternatively, you can try out Learneroo before signing up.
Comments
catypus
Oct 12, 9:03 PMpublic Picture()
{
// initialise instance variables
Doesn't work because it cannot find symbol "circle1". How do I make it work?
Learneroo
Oct 12, 9:08 PMYou need to create
circle1first (See the animation above).catypus
Oct 12, 9:24 PMHi. When you compile circle, create a new instance of circle and then compile Picture, it deletes your instance of circle. So circle1 is deleted before it compiled Picture.
How do I stop it from deleting my instance?
Learneroo
Oct 12, 9:31 PMOnly code that it's the actual source code file is saved. As mentioned, double-click on a Class icon to edit its source code.
Rinon
Feb 7, 3:59 PMMany issues with compiling? I imported the missing classes but still many other errors in Canvas.java, can't get it to work!